

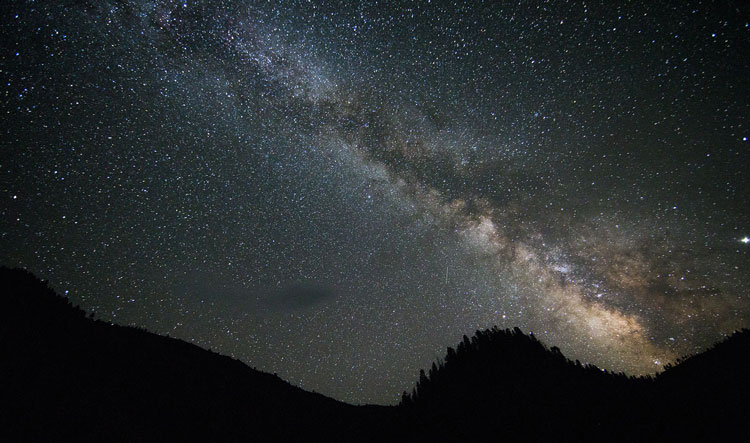
In a previous blog post, we shared our favorite star shots on the Middle Fork Salmon. Now we want to show you how to take those shots. We talked to professional photographer Garret Smith, and he provided us with a few tips on how to photograph Idaho’s incredible night sky from the Middle Fork of the Salmon River.
When attempting a star shot I always remind myself to keep it simple. It is easy to get lost in the camera setting, switching lenses, or trying on different filters. I prefer pointing the camera up at the sky and shooting. Trial and error; see what works and adapt. While star shots can seem complex, if you keep it simple and follow a few rules, you can capture that incredible image.
1) Start with a tripod. For a quality star shot, the camera needs to be stable for 10-30 seconds. To hold the camera steady, some sort of tripod is necessary. I have used rocks, tree limbs, beer cans, and other props but an actual tripod works best. Once you have figured out stability, you can start messing with the frame you want to capture.
For the camera settings, I instinctively start with the basic settings first and work my way up to the more complex ones. Sometimes it is the basic settings that can mess up a shot and take an annoying amount of time to figure out.
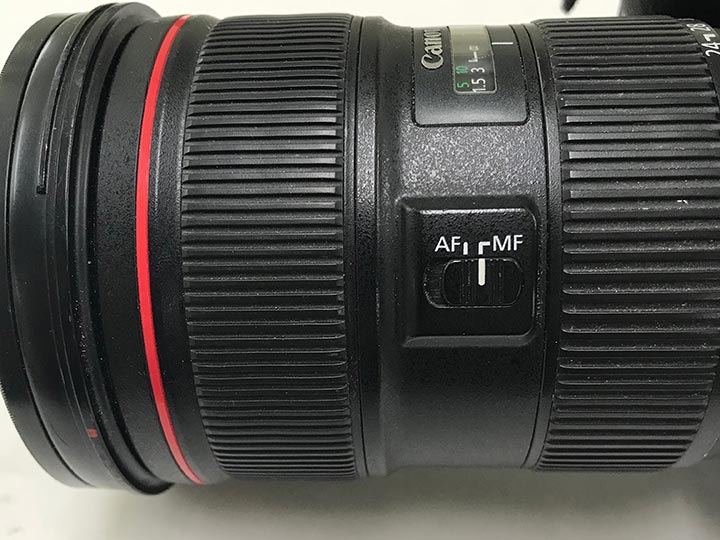
2) The Focus. You want to switch the focus from auto to manual. Just do it.
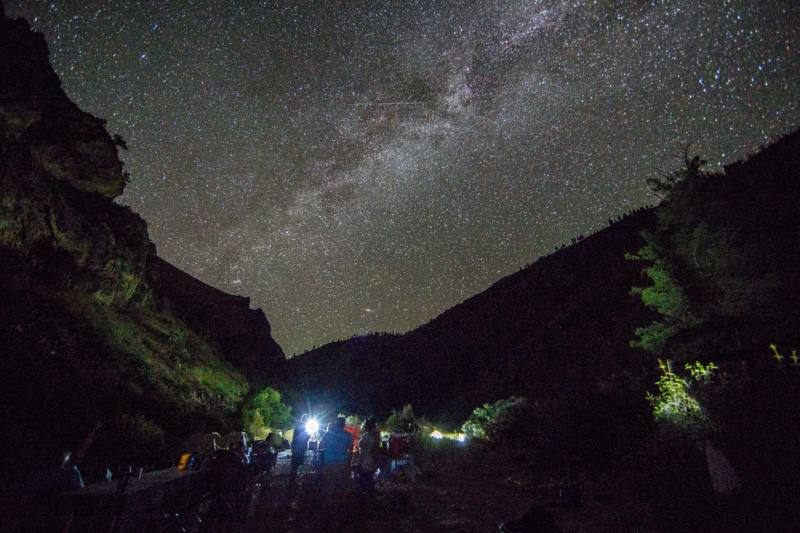
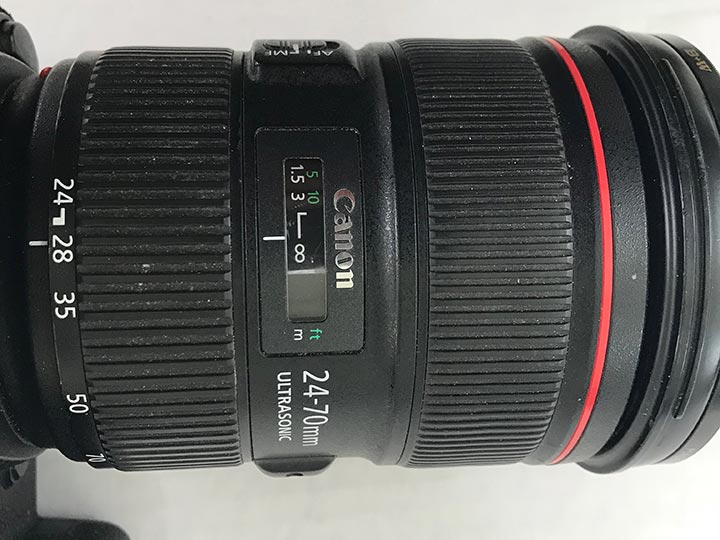
Once in manual, set your focus. This can be a bit tricky since it’s dark. Using your headlamp set the lens to infinite focus. If you do not have an infinite focus on your lens, then try focusing on one star or a distant light, like a campfire. That should put your manual focus in the correct spot.
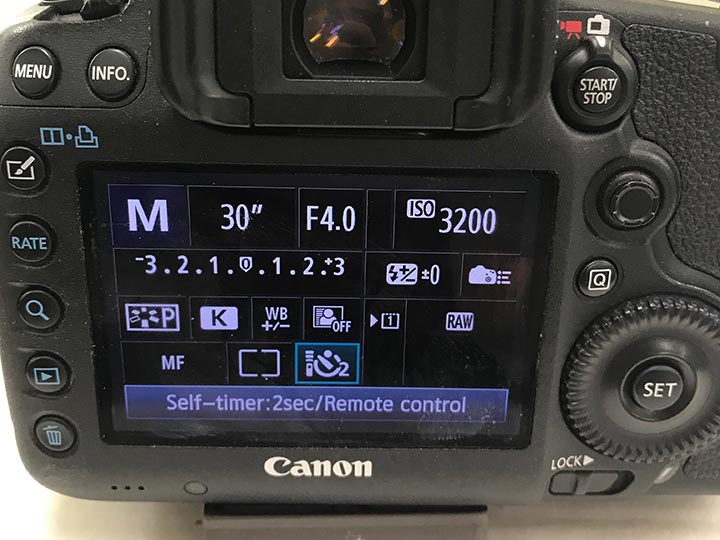
3) The timer. Many photographers use intervalometers, camera language for a remote. While a remote is a terrific tool for taking long exposure star shots, it can also be a hassle. If you are going to take a 10-30 star shot then all you need to use is a two-second timer, which is built in on the camera. It is critical to do this, because of the long exposure the pushing of the shutter button is enough of a disturbance that your image will not be sharp. The timer is my preferred method for star shots, it keeps it easy, and I don’t have to rely on a remote.
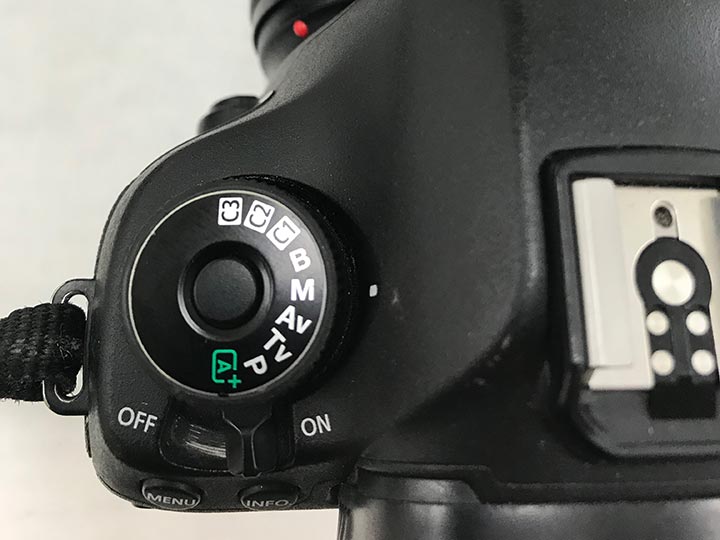
Shooting in Manual Setting. This is the hardest part about shooting stars. Take your time and make sure you get the settings correct. I strongly recommend learning how to navigate your camera settings before going outside.
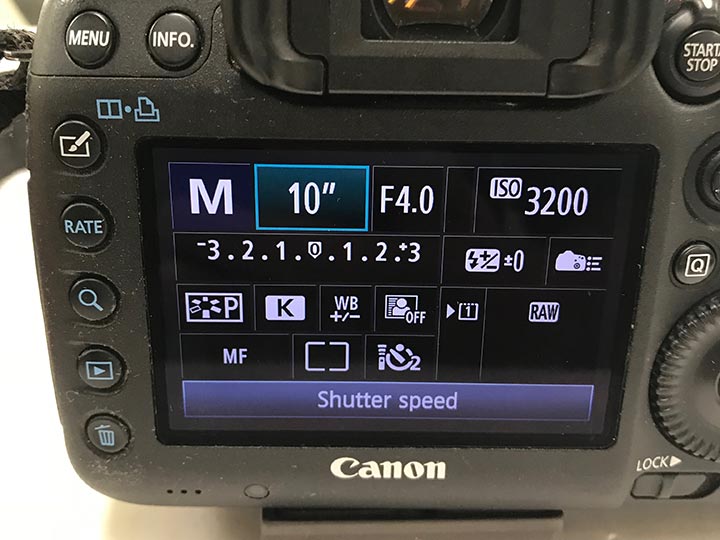
4) Shutter Speed: The eye of the camera. For your first couple of star shots keep the speed between 10-30 seconds, most nights, 20 seconds is a good shutter speed and you won’t get tracers as the stars move across the night sky. If you want movement shown, you will need a remote to hold your camera shutter down longer. For most night star shots this means the camera sensor will be open for 20 seconds, capturing as much light as possible. When your stargazing it takes your eyes 20 seconds or so to start noticing all the stars, same with a shutter speed. If you open and close your eyes quickly you will barely see any stars, same with the shutter speed. The longer your eyes are open the more stars you will see, the longer the shutter is open the more stars your photo will capture.
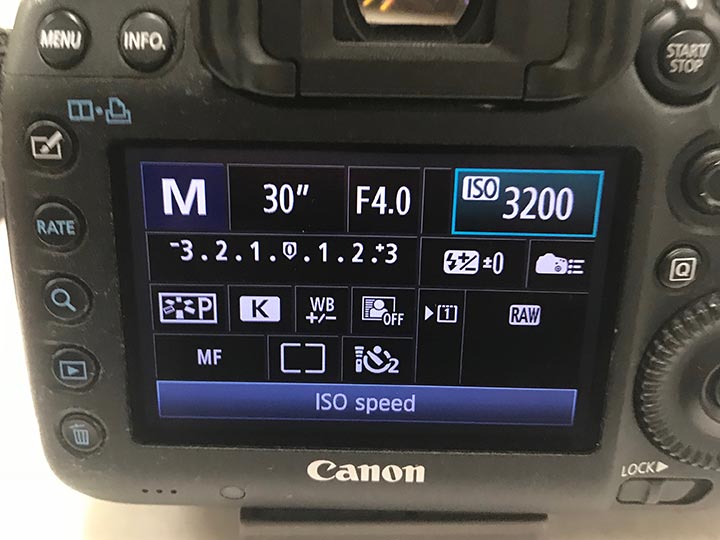
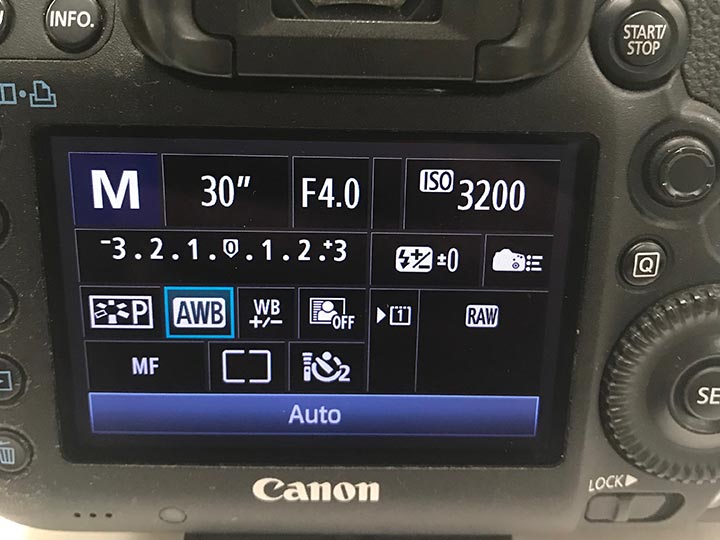
5) ISO. The artificial light that the camera will use to enhance a photo. The higher the ISO the more sensitive your sensor will be to light. It is the equivalent of ASA with film. If you shoot with too high of an ISO you will see a grainy photo because the sensor is filling in pixels with digital noise. Finding the ISO sweet spot is key, I shoot between 800-3200 ISO with Canon or Nikon Cameras, some new Sony cameras can shoot as high as 12800 ISO without getting too much digital noise. In general the lower the ISO the better image quality.
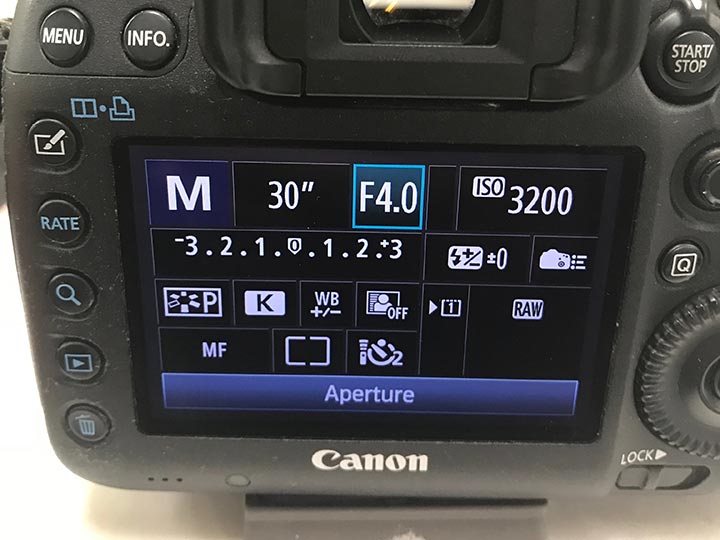
6) Aperture. Also known as the F-stop: To get a sharp star image you want to shoot at a low aperture. I like to have my aperture around f/4, f/11 is generally the sharpest aperture for most lenses but demands a much longer exposure and higher ISO. The lower the aperture the more light will be captured.
7) White balance. You can set it to auto and the shot will be fine. If you want to change it, go to 4200K.
The last thing to remember, as you are looking at the last shot you captured on your camera monitor, it is going to seem like a brighter exposure at night then when you look at it the next day, your eyes are dilated for the darkness and might not give an accurate read. I tend to make sure I am pushing my settings so that the glory of the night sky is in full effect.
Have fun and remember to bring a headlamp. You don’t want to fall on your way to capturing an award winning night photo.